首页
>
教程
>
平面教程
>
PS教程
>
平面
标志
VI
画册
包装
海报
版式
时尚
字体
卡片
广告
banner
电商
封面
装帧
地产
经典
文案
理论
论文
环艺
建筑
室内
家装
景观
理论
论文
导视
教程
平面
网页
多媒
印前
网页
网页
UI
酷站
交互
UED
书刊
理论
素材
矢量
标志
PSD
PNG
GIF
其他
壁纸
PS
工业
家具
日用
交通
电子
体育
理论
CG
插画
3D
动漫
征集
平面
工业
UI
环艺
其它
摄影
人像
风光
时尚
生态
建筑
黑白
静物
商业
其他
学堂
器材
艺术
书法
绘画
时装
理论
课堂
文化
名人
大师
公司
访谈
收起
PS简单几步创造冲击力震撼的动感效果
时间:2014-05-06 20:51 来源:优设 作者:佚名
今天要分享的ps教程将会是很多同学喜欢的,这种动感效果会为你的照片和专题头图等设计增添很棒的效果! 本教程中我们将学习如何使用径向模糊滤镜来给照片添加运动效果。径向模糊的一个缺点是不能实时预览效果,不过没有关系,我们将使用智能对象和智能滤镜来解决这个问题,同时我们也会用到图层蒙版和渐变工具。 径向模糊可以在分分钟内为图片添加酷炫的运动效果哦!~
本教程ps版本为cs3及以上,我使用的是cs6。 这是本教程用到的图片素材
snowboarder photo
。
最终效果:
开始吧!
1、 将原素材图片转换为智能对象
2、 使用径向模糊滤镜
滤镜→模糊→径向模糊,设置如下红色圆圈内数据:
效果如下:
上一页
1/2
1
2
下一页
猜你感兴趣
详解高低频磨皮方法
2016-04-19
PS教程
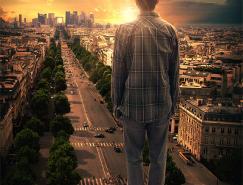
PS合成高楼中远眺城市日出场
2012-09-14
PS教程
Photoshop CS3精彩体验之七
2007-01-01
PS教程
PS设计逼真的透明玻璃艺术字
2019-03-30
PS教程
用photoshop制作Vista光线效果
2009-11-09
PS教程
最新文章
5个保姆级PS抠图教程,解决抠图烦恼!
2023-02-24
PS教程
合同和试卷模糊,PS如何让文字变清晰?
2023-02-14
PS教程
PS极坐标的妙用
2022-06-21
PS教程
PS给数码照片提取线稿
2022-02-13
PS教程
Ps制作静态烟花效果
2021-12-26
PS教程